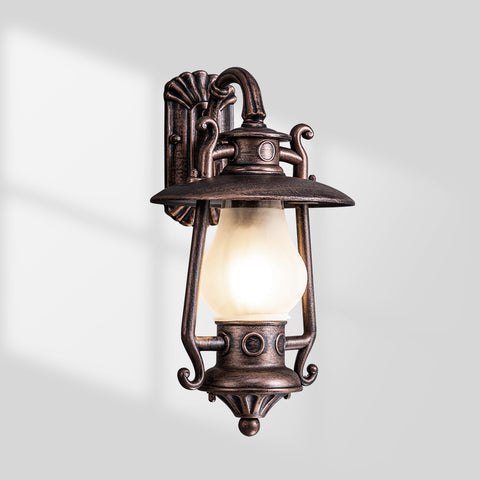
Thanks for purchasing our GZBtech outdoor wall sconce or want to want to know how to install outdoor wall sconce. Please retain the package and its inner protective materials for one month or longer. Read user manual before installation and keep it for future reference. Learn how to install outdoor wall sconce lighting with these step-by-step instructions.

1. GZBtech vintage outdoor wall sconce warranty
These instructions are suggested installation procedures only. Please be reminded that we assume no liab ties occurred from improper installation. All of our products are warranted against defects in materials and workmanship for a period of one year from the date of purchasing. We provide 1 month hassle-free full refund, 6 month money back or free replacement and 12 month limited warranty.

2. GZBtech outdoor wall sconce warning(To reduce the risk of fire. electric shock. or injury to persons)
- We suggest installation by a licensed electrician.
- Before you start, NEVER attempt any work without shutting off the electricity until the work is done.
- Mounting surface should be clean, dry, flat, strong enough and 1/4" larger than the canopy on all side. Any gaps between the mounting surface and canopy exceeding 3/16" should be corrected as required.
- Make sure that the ceiling or wall can stand the weight of the lamp before assembling.
- With silicone caulking compound, caulk completely around where back of cover meets with the wall surface to prevent water from seeping into outlet box.
- Keep the lamp away from acidic and basic objects in case of damaging the surface of the lamp.
- Shut off electricity before replacing bulb.
- Do not touch the bulb or lamp shade when the lighting fixture is working.
- The safety instructions appearing in this manual are not meant to cover all possible conditions that may occur. It must be understood that common sense, caution and care must be used with any electrical products.
3. How to do GZBtech outdoor wall sconce maintenance?
• To clean, wipe fixture with a soft cloth.
• Do not use abrasive materials such as scouring pads or powders, steel wool or abrasive paper.
4. GZBtech outdoor wall sconce warning specification
| VOLTAGE | 120V |
| WATTAGE | Max60w |
| BULB BASE | E26 Medium |
| POWER SOURCE | Hardw ired |
5. GZBtech vintage outdoor wall sconce accessories included
- Wire Con nectors*3 pcs
- Mounting Screw*2pcs
Notes:carefully remove the fixture from the carton and check that all parts are included as shown in figure. Be careful not to misplace any of the screws or parts, which are needed to install this fixture.
6. How to install GZBtech vintage outdoor wall sconce?

A. Turn off power at circuit box to avoid electric shock.
B. Screw and install'E26 Bulb 1' (Please do not exceed the maximum capacity recommended on the socket. Bulb not included)
C. Assemble the'Lamp Base 3' with·supporting Rods 4'.
D. Cover the bulb with 'Lampshade 2·. and then secure the assembled'Lamp Base 3'and ·supporting Rods 4' with lamp cover using'Top Nuts 5'.
E. Thread'Mounting Screws 6'into the matching holes of 'Mounting Plate 7'. Secure 'Mounting Plate 7'to outlet box with·outlet Box Screws 8'.
F. Connect light fixture's wires with the outlet box's wires correctly and firmly by using wire connectors. (You can cover insulating tape to the connecting areas for higher safety).
G. Attach 'Back Plate 9' to'Mounting Plate 7' by aligning 'Mounting Screws 6' with the mounting holes. Secure'Back Plate g· by screwing the'Back Plate Nuts 10'
H. Caulk completely around where back of cover meets with the wall surface to prevent water from seeping into outlet box.
I. Restore the power and you can turn on the light.
How to do the vintage outdoor wall sconce wire connecting?

- Identify the light fixture's live wire and neutral wire by Land N label (L means live wire. N means neutral wire).
- Attach outlet live wire to the fixture live wire by using a wire connector.
- Attach outlet neutral wire to the fixture neutral wire by using a connector.
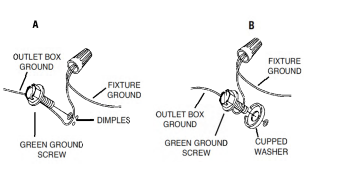
- Wrap the outlet copper wire around the green ground screw on 'Mounting Plate 7' Then tighten the ground screw.
- Connect outlet copper ground wire to the fixture copper ground wire by using a wire connector and place all wires inside the outlet box.
Thank you for reading, having any questions feel free to contact GZBtech, we will be here to offer 24/7 expert services for you.

